Packing for a Conference

Packing for a Conference - Expressing Elizabeth.png

It’s still summer time, which means there are still tons of academic conferences to go to! I’m about to head out for a big conference, so I thought it would be helpful to share my packing list and tips! There’s even a printable list at the end of this post!

Packing for a conference is much like any other packing list, but you have to add in all of the work-related things. The most obvious of these categories is clothing. It’s important to pack some casual clothes for travel days and for going out in the evenings, but you also need to bring some clothes for the conference! At every conference I’ve been to, most people are dressed in business casual. This is especially important if you’re presenting, and it’s also important as a grad student in general (the professors can get away with dressing more casually because they already have jobs!). I usually wear dresses with blazers over them, but dress pants and tops also work fine! Just remember that the conference venue is usually cool (preparing for men being potentially in suit jackets plus the large number of people). I also try to pack or wear at least two pairs of shoes that are conference appropriate (flats, dress shoes, etc.). Since you’ll be standing around a lot, they should be comfortable and easy to walk in! Other clothing to pack are workout clothes, undergarments, socks, etc.

The next category is accessories. You should be bringing a bag that’s easy to carry around a laptop and/or tablet at the conference. Many conferences give out bags, but these usually aren’t that sturdy, plus everyone has them so it’s harder to keep track of your stuff! I also usually pack a small cross-body purse so that I can just throw essentials in it when going to find food or do some tourist-ing. I also pack jewelry and hair accessories (tons of hair ties and bobby pins), but these are of course personal preference!

Finally, you need to bring all of your toiletries! Toothbrush, toothpaste, shampoo, etc. Whatever you usually bring will work here too! I usually try to throw in a little make-up so I can look put together at the conference even if I don’t feel put together!

There are a few other categories of things that you likely bring when you travel anyway, but are important to remember: technology (laptop, tablet, chargers, etc.), travel plans (travel information, contact information, sheets and towels if you’re renting an AirBnB, etc.), and miscellaneous stuff (magazines, snacks, tickets, wallet, keys, ID, etc.).

The most important category is the conference specific stuff! This includes things like your registration information. I also like to throw in a few business cards in case someone wants one. If you’re presenting a poster, make sure to bring that! If you’re giving a talk, you need your laptop, relevant dongles, your slideshow, etc. You should also bring a USB drive to put your presentation on. Not only is it good to have a backup of your presentation, one presenter in the session inevitably decides it would be easier/faster for everyone to use the same laptop so you need to move your presentation over to another laptop. And the wifi is never working when this needs to happen, of course.

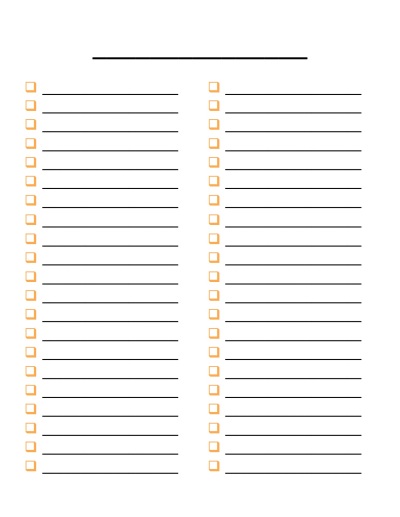
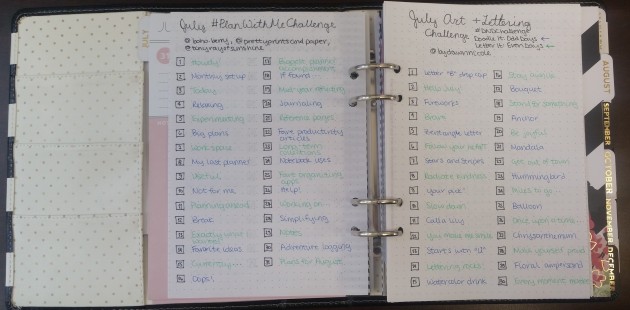
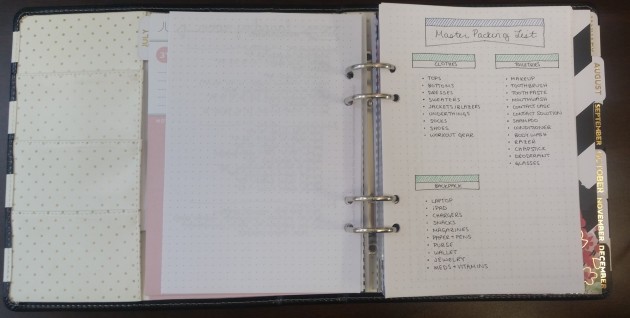
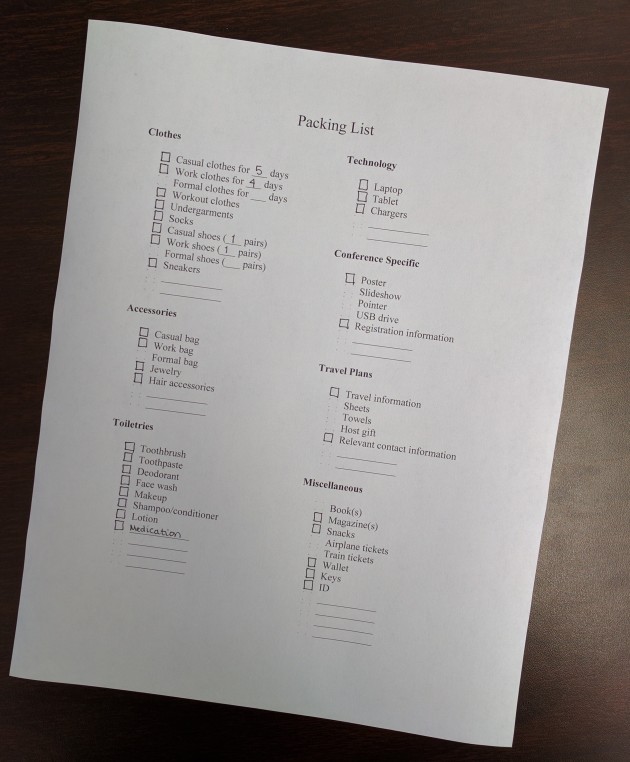
I put together a printable packing list with many of these essentials listed plus some blank lines to add your own stuff! Each of the items has a little box next to it that only has it’s corners filled in. I just finish making the box for everything I’m brining with me on this trip, and I’m ready to check things off as I add them to my suitcase! I’m presenting a poster at the conference I’m heading to soon, and I’m visiting family at the same time. It means I need lots of clothes plus, of course, my poster! Here’s my list as it stands now:

Packing List - Expressing Elizabeth

Happy packing and happy travels!

Expressing Elizabeth - Signature

P.S. You can get the printable packing list here.


Weekly Spread Evolution

Weekly Spread Evolution in my Bullet Journal - Expressing Elizabeth.png

I’ve been using my current planner/bullet journal fusion since the beginning of July (you can see a description of the entire planner here). I want to go over some of the weekly spreads I’ve been using, including what I like and don’t like about them!

For most of July, I used a one-page weekly spread that contained a bunch of the general information for the week. I followed these up with daily spreads.

JulyWeek4Spread - Expressing Elizabeth

I divided the task list into two main sections: work and personal. Work obviously covers all of my school, research, etc. The personal side covers everything else. The two most interesting sections for most people are probably the sleep and mood graphs at the bottom. The sleep graph just has the hours going up the y-axis, ranging from 5 to 10 (hopefully I sleep at least 5 hours a night!). The days go along the bottom. I just put a single point for each day, which tells me how many hours I slept the night before. The mood graph is a bit more complicated. The y-axis has the mood options: the letters are abbreviations for awful, fugly, meh, good, and rad (taken from the Daylio app’s mood options). The days go along the bottom again. The three colors are for the main divisions of the day: morning, afternoon, and evening. I just connect each time of day so I can see how they change throughout the week.

The next different weekly spread I have is from last week, when I was doing my qualifying exams. Obviously this one is a bit different! I don’t have any daily spreads, so everything is included in these two pages.

JulyWeek5Spread - Expressing Elizabeth

The right page is similar to what I usually include on the one-page weekly spreads: the sleep and mood graphs, monthly calendar, task list (this time just as a single list), and a future tasks lists (for stuff coming up in future weeks). The left page is for the individual days. I tracked my water intake for each day along the top. For each individual day, I would list abbreviated names for the tasks, tracking what I got done. It was definitely a busy week!

Finally, we get to this week’s spread. I don’t have very many appointments and I’m basically just preparing for a conference for next week. Therefore, I did another two-page weekly spread that covers everything.

AugustWeek1Spread - Expressing Elizabeth

Obviously, this is not entirely filled in yet. The right page includes the general stuff again, although this time I put the trackers and the weather on that page as well and get rid of the monthly calendar. I skipped tracking weather last week since I hardly went outside. The left page has my daily task lists again, just like last week. Since I forgot to put in my sleep and mood trackers when I first made the page, I just added it in at the bottom of the right page. I put both graphs into one by having two y-axes. The left one has the hours of sleep and the right one has the mood options. I still have three colors for my moods, but I have to overlap the black for both mood and sleep, so sleep is getting labeled with a diamond rather than a circle for each day. Luckily (or unluckily), I tend to have relatively low amounts of sleep each night and relatively high moods, so there’s hardly any overlap!

Hope this gives you inspiration for your own weekly spreads! Share with me what you do!

Happy planning!

Expressing Elizabeth - Signature


Get Your Writing Organized

Get Your Writing Organized - Expressing Elizabeth.png

Writing anything can be challenging. Especially when you have a ton of writing to get done, it’s important to get it organized! My qualifying exams start in one week (Aaahhh!!), which means I’m about be writing non-stop for a week in a row. I will need to be answering six questions, each of which will take about five pages to answer. I don’t know what the questions will be (except that they’re related to my reading list, which is over 100 papers), so I will need to formulate my responses quickly so that I can get everything done in time.

The best way for me to do this is to write out my main points, arguments, etc. I usually do this just on scraps of paper. However, since I’ll be answering six questions at the same time, that could get confusing quickly! I looked around the internet for a printable that could help me get organized, but I didn’t really find one that I like. Obviously, the best solution was to make one and then share it with all of you!

These printables are not fancy or beautiful, but they will definitely help you organize your thoughts to write quickly and effectively! The first page lists the question (or whatever you’re prompt/goal is), the main point (essentially what you’re arguing), and boxes for arguments and the relevant articles to go with them.

writingOutlining Page 1 - Expressing Elizabeth

Within the argument boxes, write each of the facts/opinions that you are using to support whatever your main point is. Then there is a box to the right of each argument box. This is where you can write down the authors, dates, etc. that are relevant for the argument that you’re using. This will make it so much easier for you to do citations when you’re writing!

The second page includes spaces for a counterargument and rebuttal, outcomes/future directions, and conclusion.

writingOutlining Page 2 - Expressing Elizabeth

Some particular writing projects don’t require counterarguments, but in case they do (like they might in my case), I have included a space to write down a counterargument, as well as the box for the relevant articles. Obviously, if you use a counterargument, you should have a rebuttal! Therefore, there’s space for a rebuttal and the relevant articles as well. The outcomes/future directions section can include future research based on the argument, potential confounds, etc. The final section is the conclusions section, where you can write any final thoughts you might need for the concluding paragraph of your writing project!

Happy writing!

Expressing Elizabeth - Signature

P.S. Here’s the printable! Open it here.

DIY Birthday Cards!

DIY Birthday Cards! - Expressing Elizabeth.png

This post is going to be a little different from what I’ve done so far. I want to share this though! It’s super important while you’re in grad school, or really any time, to have hobbies. One of my favorite things to do is to make handmade greeting cards!

This month has a ton of birthdays in my family, so I’ve been making some cards! Here are couple that I’m going to share today, so you can see them! I unfortunately didn’t take pictures while I was in progress, but I will still share some details!

The first card I made is for my aunt. I wanted something that was interesting, but not too overwhelming. Plus, I wanted to use some of my brush pens, since she got them for me for my birthday!

teabagFoldedCard - Expressing Elizabeth.jpg

This card looks pretty complicated to make, but it’s not hard at all! I found directions for making teabag folded flowers on Pinterest. There are tons of options, but I liked how this one looked. The flower is made up of 8 folded squares (each 1.5×1.5 inches), which are then glued together into the circle that makes the flower. I also cut a strip of blue paper that was 1.25 inches tall and as wide as my card. My blank cards are all 5.5×4.25 inches. I got them in a big set (80 cards and envelopes) from Michaels! All I did was glue the strip of paper down a bit below the middle of the card, then glued the teabag folded flower on top of it, offset from the center of the card. Then I just used my pens to write Happy Birthday! (in the end I used the non-brush end of the pen, but oh well!).

The second card I made is for my grandpa. He likes black and red, so I wanted the card to reflect that while still being colorful!

squaresCard - Expressing Elizabeth

I found five different pieces of scrap paper and another one of the cards from Michaels (this one in black instead of hot pink). I cut two 1.25×1.25 inch squares from each of four of the papers and arranged them in a grid over the top 2/3 of the card. Then I cut a long strip from the gray paper that is 1.25 inches tall, but as long as the space from the left edge of the left-most square to the right edge of the right-most square on the middle row. I wrote Happy Birthday! on this one too (please excuse the handwriting, I’m disappointed about this too). I just glued that onto the bottom third of the card and I’m done!

These are super easy, so anyone can make them! And they’re so much more personalized than what you can buy at the store! Hope you enjoy!

Happy crafting!

Expressing Elizabeth - Signature

Organizing a Course in Your Bullet Journal

Organizing a Course in Your Bullet Journal - Expressing Elizabeth.png

I’m getting ready to start teaching again, so obviously I need some details in my bullet journal/planner (you can find details about the whole planner here)! I put most of the details for the course in online/digital documents. Things like the syllabus, slides, etc. are all there. However, I do like to have a brief outline that I can quickly reference! It’s nice to go over before class starts each day.

Right now I’m teaching a course for high school students as part of a summer “camp.” This means there isn’t any grading, so I don’t need to include any of those details in this layout! I do want to keep track of the objectives and outcomes, though, so that I can stay focused on the goals. I really want the students to get some broad ideas rather than all of the tiny details, so putting these where I see them a lot really helps me stay focused on these goals.

I just have a basic page, which isn’t beautiful but it works. Obviously it starts with the course title, and then there are the objectives and take-aways.

course planning page - Expressing Elizabeth

Right below the title, I put the main course objectives. These are things that we are hoping students will walk away with at the end of the class!

objectives - course planning page - Expressing Elizabeth

Finally, I put a short description of each day. I haven’t finished this yet, but I’ve gotten started. In this, I put the title of the day (what I call it on the syllabus), as well as some broad topics we’re covering (AKA the main ideas it would nice for them to remember a bit about) and the take-aways. My take-aways are the tangible skills/products they will leave with at the end of the day. For example, after Day 1, my students should know the basics of programming in Prolog and will have some Icelandic that they’ve transcribed, which they will use for Day 2 to make a vowel classifier (also a take-away).

day details - course planning page - Expressing Elizabeth

Hope this can help you define your goals for your students when teaching and keep yourself focusing on these ideas!

Happy planning (and teaching)!

Expressing Elizabeth - Signature

Home Binder to Get Your Life Organized (with FREE printable!)

Home Binder to Get Your Life Organized with FREE printable - Expressing Elizabeth

Home binders are one of those things that you see all over Pinterest, which is pretty awesome! They’re also super useful! I tend to struggle with the ones I’ve found online, though, because they are all designed for families with tons of kids! Since that’s not applicable to me, I ended up just giving up for a long time. Then I made my own, which I’m sharing with you!

My boyfriend and I use our home binder all the time. It has a calendar in it for easy reference, lists of things we care about a lot (more about that below!), weekly calendars with all of the relevant activities, and more! I’m going to share how I set my home binder up and how you can get yours ready too!

The first thing that you see all the time with your home binder is the cover! Obviously you want it to be easy to identify, but also beautiful! I included both a front and a back cover, so it looks great!

I left the title space blank, so you can call your binder whatever works for you! I went with the descriptive, but boring “Home Binder” option.

Home Binder Cover - Expressing Elizabeth

A handy thing to put right in the front is a calendar that includes all of the dates for the year! I have a 2016 one included in the printable, and of course there will be an updated option in December to get ready for next year!

HomeBinder - Expressing Elizabeth Calendar

Sometimes you need more information than you can get on this page alone, so I also have these calendars split out to four-to-a-page with some lines. I write down all of the important dates for the months on the lines so that I can keep track of everything! Here’s what just one of those pages looks like!

HomeBinder - Expressing Elizabeth Dates

Here’s how I use it for myself!

Home Binder Monthly Dates - Expressing Elizabeth

I then include a bunch of lists that I find relevant to our lives. For us, that means a list of what we’ve fed our cats (we need to know what they don’t like!), a shopping list (where we put things that we need eventually, but not urgently), and a list of meal ideas (for when we don’t know what to make but don’t want to go out). I included both turquoise and orange versions of the list page in the printable set! I print them back-to-back and print a bunch of copies so I always have enough space for everything we need!

HomeBinder - Expressing Elizabeth Notes

Here’s what my meal ideas list looks like at the moment.

Home Binder List - Expressing Elizabeth

Finally, the most important part! The weekly calendar! This is where we put all of our activities that the other person needs to know about. AKA I don’t really need to know when his meetings are at work, but it’s good to know if he’s working late. And, of course, all of the activities we have planned to do together! I list the week that the current week is in the year, as well as the dates. Then I can keep track of where we are!

HomeBinder - Expressing Elizabeth Week

I color-code our calendars so that we know who is connected to each activity. My activities are in green, his are orange, and the activities we both do are in blue. I keep all three of these pens, plus black, in the front pocket of the binder so I never lose them! Here’s what our next week is looking like.

Home Binder Week - Expressing Elizabeth

Of course, to be able to successfully find everything in the binder, we need some tabs. I mark the important lists, plus I put a tab for the month on the first week of that month so I can skip right to the correct current location.

HomeBinder - Expressing Elizabeth Tabs

To use these tabs, all you do is cut one out, fold it in half, write whatever you want on it, and glue it to the page. Here’s an example!

Home Binder Tab - Expressing Elizabeth

On top of all of these things, I have a few other things that go in the binder, but I don’t have pages for. First, my town gives out a sheet of important phone numbers (the town hall, library, hazardous waste, etc.). This goes in the front pocket of the binder for easy reference. I also tuck some envelopes with receipts and Box Tops in the back of the binder so that I can add them as I collect them. I have some blank pages mixed in with the weekly pages so we can add to-do lists for house work, etc. Finally, I made a couple of pockets that I put take-out menus and empty envelopes in. I’ll share a tutorial soon on how to make these!

Home Binder Pocket - Expressing Elizabeth

Happy organizing!

Expressing Elizabeth - Signature

P.S. You can find the printable with all of the pages I talked about here. Don’t forget to sign up for the newsletter to stay up-to-date on the available printables!

Organize Your Qualifying Exam Readings (Or Really Any Readings!)

Organize Your Qualifying Exam Readings (Or Really Any Readings!) - Expressing Elizabeth

I’m currently in the middle of reading for my qualifying exams. It’s taking up all of my time, as you may have guessed. But, I’ve been super organized to keep myself on top of everything! I’m going to share how I keep everything together! You can use this for your own qualifying exams, or for any time that you need a read a ton of stuff!

Every qualifying exam (compulsory exam, whatever they’re called at your school) is a bit different. However, they typically involve reading a bunch of things and then answering questions. I have to read about 100 papers (103 to be exact), then spend 96 hours answering questions that my committee sends to me.

I find that I work best by printing out the papers to read. I did this all over several days at my office. I find that printing them out is super helpful in making sure that I understand all of the information in the articles. Plus I can underline important information and make notes in the margins! I even do this in different colored inks, so each day of reading gets its own pen to help keep me engaged! However, I also want to make sure that I have electronic information of all of the papers so that I can search them, reference them when away from the paper copies, etc. I will talk about how I get that all organized too!

In order to handle the full amount of pages (it’s a bit crazy how much space they all take up!), I have put everything into three different binders. Due to the requirements of my qualifying exam, I have three sections, so I could divide the papers into these same groupings, which is easy and natural.

reading organization binders - Expressing Elizabeth

For each of these, I added a cover page, which I found from How Does She. I also put in a binder spine with the section label, which I found from Vanilla Joy. This makes them more beautiful and easier to tell apart!

front closeup reading organization binders - Expressing Elizabeth

spine closeup reading organization binders - Expressing Elizabeth

Within each of the binders, I have subsections for the larger sections, so I put in some tabbed dividers that separate these as well!

tabbed dividers - Expressing Elizabeth

I then printed out the list of papers (the citations) for the relevant section and placed it in the front of the binder so that I can recall what is in each section and make them easier to find.

section readings list 2 - Expressing Elizabeth

I also have a couple of other ways to keep everything organized, as I discussed above. Everything is put into electronic form in addition to the paper form that I actually read. I have an excel spreadsheet, where I create my own summary of each of the papers, divided into sections. The important sections are:

  • Authors
  • Publication Date
  • Results
  • Findings
  • Journal
  • Volume
  • Issue
  • Pages
  • Notes (where I put anything extra I want to say)

Finally, I have everything stored in Mendeley (my preferred reference management system, you can see other options here). I make sure that all of the information is appropriately filled out about the paper. I then add a bunch of tags, which will make the papers easier to find and reference when I get to answering questions! Tags are things like:

  • Section/subsection name
  • General field keywords
  • Specific field keywords
  • Methodology
  • Models discussed
  • Other terms that I think will be relevant to my research/questions

Hope this helps you get all of your reading organized!

Happy reading!

Expressing Elizabeth - Signature

Corner Bookmarks – Free Printable!

Corner Bookmarks - Expressing Elizabeth

I often need to find pages in books, and especially my new planner (see a tour here)! Regular bookmarks always fall out (does anyone else have that problem, or is it just me?) Corner bookmarks are super cute and they don’t have that problem! I decided to make some of my own that are (if I do say so myself) super cute!

Get the free printable at the bottom of this page! Here are the steps to put them together! All you need is a printer (to print the page, obviously!), scissors, and some glue (I use a glue stick since it’s easy!).

Start by cutting out one of the shapes that looks like a square with two triangles attached to it and one square. I picked them in matching colors, but feel free to mix and match them!

corner bookmark cut out - Expressing Elizabeth

Next up you need to fold in the two triangle parts so that they have creases in them. This works best if you fold them in on the back.

corner bookmark fold - Expressing Elizabeth

Then you just glue the patterned triangle on top of the plain white triangle. This is a little tricky, but not too bad if you do it carefully! It doesn’t have to be perfectly flat, a little domed is OK since you want space to put the page in anyway!

corner bookmark closeup - Expressing Elizabeth

Next, flip it over and and glue the patterned square onto the back so that they line up. Now there’s a cute back to the bookmark too!

corner bookmark back 2 - Expressing Elizabeth

If the edges don’t line up perfectly, do your best and then feel free to trim any leftover white bits around the bottom edges (the ones where the triangles are not connected).

Now you have a finished adorable corner bookmark!

corner bookmark example - Expressing Elizabeth

Enjoy!

Expressing Elizabeth - Signature

P.S. Here’s the printable for the CornerBookmarks. You can get all four colors on one page!

Planner Set Up – Bullet Journal/Traditional Planner Fusion

Planner Set Up_ Bullet Journal_Traditional Planner Fusion - Expressing Elizabeth

July is just around the corner! It seems like summer is moving so quickly! The regular school year will be starting just around the corner, but I have a ton to get done still this summer, of course. I always start my planners in July so I have time to get ready for the school year! Plus I can use it for all of the things I have to get done this summer. I can also work out the kinks. 🙂

Since July is so soon, I’ve set up my planner so that I’m ready to go on Friday! I just wanted to share with you how I set it up. Hope you find some inspiration! I have a bit of an unusual approach to planning: I use a combination for a more traditional planner and a bullet journal. In case you don’t know anything about bullet journaling, start out here. For this coming year, I’ve combined it with a Heidi Swapp memory planner, which I found on sale at Michael’s a while back. There are several options for these planners. The one I have is super cute, with black and white, with pink and gold accents! I love how beautiful it is!

Here’s what the cover looks like!

planner cover - Expressing Elizabeth

So here’s what it looks like inside! The first, and probably most important page, is my “if found” page. This tells people who I am and how to contact me if they find this planner laying around somewhere after I left it (something that will inevitably happen).

planner if found page - Expressing Elizabeth

I removed the personal information before putting it up here, but you can see what I’ve included! My name is found inside the banner, then I include my email address (I include my professional one, since this is mostly used for work stuff, plus it’s easy to find on the internet if necessary!). I also include my boyfriend’s name as my emergency contact. I just mention on the page that someone can find his number in my phone, since they will only need the emergency contact information if I’m with the planner and the phone!

The pockets just have scrap paper right now, but I’ll add additional things as I need them (paper clips, etc.). I’ll share them if they get added! Also, aren’t the polka dots super adorable!

Next up comes some other stuff that I will be referencing frequently! First up comes the year-long calendar. I include the months from July 2016 to June 2017, since that’s when I will use this particular planner. It doesn’t include anything except the dates and days of the week, but this lets me get an idea of what dates are reasonable for scheduling things out several months.

planner year calendar - Expressing Elizabeth

Then I put in my key. This is an important element of any bullet journal! I will likely change this a bunch as it goes along! It’s nice to have it at the beginning so that I can reference it as I make each of my pages! I also can just replace it if I change my mind about what I want to include!

planner key - Expressing Elizabeth

The final thing in the reference section is some inspiration for date layouts for when I include daily spreads! This was copied from Abby H. on the Bullet Journal Junkies Facebook page. This will give me lots of ideas when I go to make my own date information on my daily bullet journal spreads!

planner date layout inspiration - Expressing Elizabethplanner date layout inspiration and divider - Expressing Elizabeth

Also, isn’t the divider from the Heidi Swapp planner great! It has inspirational quotes and I can make sure everything stays organized. I rearranged the original planner order from having January first to having July first so that it goes in the order that I actually use my planner.

The next section is all pages that are from the original Heidi Swapp memory planner. I haven’t filled in the information for most of these sections yet. I will add pictures and information to the Photos of the Month section. I will also add in some memorabilia into the clear sleeves. The vertical monthly calendar I use for important holidays. Between me and my boyfriend, we have a lot of holidays to celebrate! I include American holidays, plus Chinese, Christian, and Jewish holidays (wow, we have a lot to celebrate!). This month doesn’t look too full, but we’ll see how it goes for the rest of the year!

planner pages - Expressing Elizabeth

The Heidi Swapp memory planner also includes a section to talk about things that happen during the month under Thankful For, That was Awesome, and I Probably Should on the back of the vertical calendar.

planner pages 2 - Expressing Elizabeth

Next up comes the monthly calendar. I use this basically like a monthly spread from a bullet journal, but it comes with the traditional planner, making it easier to fill out! It also has space for a quote, goals, and happenings. It’s not quite all filled in yet, but it’s nice to have those spaces!

planner monthly spread - Expressing Elizabeth

The final section that comes from the traditional planner is the daily pages. I’m not going to use this quite the way it was intended though. The lines I will use to write something good from each day. It’s important to remember the good moments to help me keep my spirits up even when grad school is tough! I will use the blank areas for one of the Instagram challenges I follow (#rockyourhandwriting#dndchallenge, or one of the others I haven’t picked yet!). Which one I choose will depend on the day. I struggle to keep up with doing one challenge every day, so choosing between challenges will help keep me motivated and inspired!

planner daily pages - Expressing Elizabeth

To go along with this, I have copied down the challenges that I plan to participate in (for at least some of the days). So far I have the #rockyourhandwriting and #dndchallenges I talked about above, plus the #planwithmechallenge. I might add some more, but not so far! Follow me and visit my Instagram page to see my posts related to each of the challenges, plus some planner posts!

planner challenges 1 - Expressing Elizabethplanner challenges 2 - Expressing Elizabeth

I next include some bullet journal style pages that I use for reference. We’re currently trying to redo our laundry room, so it’s helpful to have the measurements with me all the time!

planner laundry pages - Expressing Elizabeth

I also have a master packing list. I can just move this to the appropriate location in the planner whenever I need to travel. It includes everything I take with me, so I can just go down the list when I pack and add the applicable things to my suitcase!

planner master packing list - Expressing Elizabeth

In my attempts to be healthy, I’ve been doing a bunch of workouts from Youtube. I’m finishing up a 30-day sequence chosen beforehand, so this schedule isn’t totally filled in. I’ll be adding the rest before we get to those days!

planner monthly fitness calendar - Expressing Elizabethplanner monthly fitness calendar close up - Expressing Elizabeth

The last thing I have in this month is my “weekly” spread for the first week in July. I like to start on Monday for each week, so this weekly spread only has three days. I only have a weekly spread since it’s a holiday weekend, I don’t really need daily spreads, so I haven’t included any of those. My weekly spreads change basically every week. Visit my Instagram to see some of the other layouts I’ve used in the past.

planner weekly spread - Expressing Elizabethplanner weekly spread close up - Expressing Elizabeth

I still have a bunch of blank pages after this, which I will use for my future daily and weekly spreads for the rest of the month. I just print these off of the internet and then cut them to size.

planner blank pages - Expressing Elizabeth

As a bonus, I also have a page in the very back of my planner. This is a spread that includes all of the states that I’ve visited. My goal is to get to all of them! 31 done, only 29 to go! I put it in the back since I don’t reference it often (it’s hard to travel during grad school!), but it’s nice to have so that I can reference it when I’m trying to plan a new trip!

planner travel spread - Expressing Elizabeth

Hope this inspires all of you to create awesome planners that work exactly how you would like it too! Don’t forget to comment below and/or email me with all of your awesome ideas and questions you have!

Happy Planning!

Expressing Elizabeth - Signature

P.S. Here’s a Pinterest option that includes more of the details!

Bullet Journal_Traditional Planner Fusion - Expressing Elizabeth

Write Amazing Emails to Get Awesome Help from TAs and Professors

Write Amazing Emails to Get Awesome Help from Instructors - Expressing Elizabeth

Regardless of what your major is, likely you have been in at least one class with a TA, and you definitely have had many professors! Obviously, there is a wide range as to how successful each of these people are, but there are also ways that you can help yourself get the best help possible from them! One of the most easy and effective of these is to write amazing emails to them so that they know that you are serious about getting help! They all want to make your education more successful and want to help, but they don’t want to feel like they’re being taken advantage of. Usually when you’re emailing a TA or professor, you’re asking them to do extra work to help you. They are there to do that, but they also have many, many other responsibilities. Therefore, crafting an email demonstrating how prepared you are to meet with them will make them happier and more helpful!

Some of my students have written great emails, which is awesome! But there are a lot that leave something to be desired. A typical email from my students goes something like this (this is obviously not a real email, just how they often go):

Subject: Re: General Class Announcement About Exam

Hey Liz

I overslept/woke up with a massive hangout and therefore I wasn’t in class. Did I miss anything?

Now, obviously I will answer this email, but it does not give me an indication of where the student really is, except that they apparently did not do any preparation before emailing me. Therefore, my answer is likely something like “Please go through the posted materials from class today.” Not likely to be super helpful, but that’s where a student needs to start! In more specifics, here are the main issues with the email:

  • The email is just a reply to an email I sent out the entire class. This means that I don’t have any information about what the email will be about from the subject header (and the information that is there is probably inaccurate for this email), and it makes it more likely that it gets caught in the other 1000 emails I get every day and I don’t see it as something that’s urgent.
  • The greeting is very informal. I’m not saying that students should all be super formal with their TAs and professors! That’s not necessary! However, instructors are not your friends, so try to show a little respect. “Hey” is how you talk to friends. “Dear”, if you’ve never talked to them before, or “Hello” or even “Hi” might be OK, especially if you’ve communicated before.
  • Unless I explicitly told you that you could use a nickname (which I have never done with my students), you shouldn’t assume. I’m sure that you would like to be called by your preferred name, so please do the same for your instructors. Shortening my name (or any instructor’s) indicates laziness and a lack of respect. These don’t create a lot of excitement about helping you! If you’ve never talked to this TA or professor before, it can’t hurt to be more formal (e.g. Ms. or Mr. or Dr. so-and-so). A first name can be fine, but use the full name that was used to introduce themselves at the start of class. If they’ve sent an email before, they might have included a helpful hint about how to address them in the signature (for example, I usually sign my emails “Elizabeth”).
  • The reason for being absent. If you were in the hospital/otherwise sick/dealing with a family emergency, then it’s important information because you’re likely asking for an accommodation, which school policy likely says can only be given out in those few situations. Otherwise, just saying you were absent is sufficient. Again, your instructors are not your friends, so they will not want to know how hungover you are. Also, missing class for being hungover or failing to set an alarm indicates a lack of seriousness, which may make them doubt how serious you are about doing the work required to catch up.
  • “Did I miss anything?” The answer is always yes. I have never seen/heard of a professor who does literally nothing with class time. There are different levels of productiveness, but they’re always doing something! Better email: what you’ve already done to catch up (e.g. worked through the slides posted online, watched the posted lecture, etc.)
  • Signature: please sign your emails! There are many students in the class and it’s nice to know who we’re talking to! Also, if my response recommends scheduling a time to meet, it’s nice to know who to expect at office hours!

With these things in mind, here’s a better email to your TA or professor:

Subject: Psych 101: Questions about Missed Lecture

Dear Elizabeth,

I was absent from class earlier today. I have therefore worked through the slides/recording of class today. I think that I understand the broad topics that were covered, but I have a couple of specific questions. Unfortunately, I also cannot make office hours tomorrow due to another class scheduled at the same time. Would it be possible for us to set up a meeting at your earliest convenience to work through my questions? I am generally available on Monday and Wednesday mornings and Tuesdays and Thursdays after 2.

Sincerely,

Jessica Smith

This email includes all the things we talked about above! Furthermore, it suggests a solution to the problem: having a meeting! It also includes some possible meeting times, with several options so that the TA/professor can provide the best timing for themselves that’s compatible with your schedule!

Following this simple guideline will tell your TA or professor that you are a responsible, respectful student interested in doing his/her best. This will get you in their good graces and they will be extra helpful!

Best of Luck!

Expressing Elizabeth - Signature